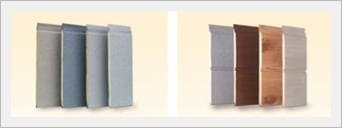
Ultra PS Board
Negotiable Min Order Quantity Unit
- Required Quantity
-
- Place of Origin
- Payment Terms
- Negotiable
- Production method
- Negotiable
- Shipping / Lead Time
- Negotiable / Negotiable
- Keyword
- Category
- Chopping Blocks
- Country / Year Established
-
 South Korea
/
- Business type
- Others
- Verified Certificate
-
17


| Product name | Ultra PS Board | Certification | - |
|---|---|---|---|
| Category | Chopping Blocks | Ingredients | - |
| Keyword | - | Unit Size | - |
| Brand name | - | Unit Weigh | - |
| origin | Stock | - | |
| Supply type | - | HS code | - |
Product Information
Types and specifications of Ultra PS Board
|
NS-100
|
NS-200(R/P Type)
|
||||||||||||||||
 |
 |
||||||||||||||||
|
|
||||||||||||||||
|
|
 |
||||||||||||||||
|
NS-200 (Siding Board Type)
|
NS-300(Siding Board Type)
|
||||||||||||||||
 |
 |
||||||||||||||||
|
|
||||||||||||||||
|
|
 |
How to apply ultra polyurethane siding board
- Steel House

Comparison between other materials and polyurethane siding board installation (section)

- Remodeling

Installation Process
- Maintaining fixed intervals, (i.e. 500mm), fix studs(steel/wood) to the outer wall
- Attach urethane siding boards on the studs
Subsidiary materials for ultra PS board (specification)
- Detailed drawings of subsidiary materials

How to install the ultra PS board
For connection between ultra PS board and OSB board or girth. Use only self drilling screw, and be careful not to apply excessive force to avoid damaging uitra PS board

- Base mould installation
Mark the outer wall to which the siding board will be installed, with ink lines. Then install the base mould. Ensure the corner is attached tightly, by forming a 45 degree angle - In corner/ Out corner mould (cornermould) installation
The corner mould is divided into internal and external parts. The in corner mould must be tightly fixed onto the wall. If the installation of the siding board is completed, connect the outer mould to the inner mould to complete installation - End mould installation
Ensure the window frame or the door frame is completely perpendicular and flat. Then install the mould tightly by forming a 45 degree angle for the part where the corners meet - Joint mould installation
- When connecting the siding board one after another, use in corner and out corner moulds to form the connections between the boards
- To install the joint mould, mark the center with an inking line prior to installing the siding board. Fix the in corner mould tightly to the wall
- Install the siding board, and connect the out corner mould to the in corner mould previously installed to complete installation
B2B Trade
| Price (FOB) | Negotiable | transportation | - |
|---|---|---|---|
| MOQ | Negotiable | Leadtime | Negotiable |
| Payment Options | Negotiable | Shipping time | Negotiable |
Related Products

Sanitary cutting board

Double Save S Cutting Board

Puli - Antibacterial cutting board

Index Cutting Board 3P Set BPA Free Made in Korea

Omaju Cut Platter XL


